Given the rebranding of this site, I have added jsonwriter.com as the domain name for this website. I had done this previously 6 years ago with jasonloo.co.
Lets take a look and see if the process is the same.
Domain Registration - NameCheap
I decided to return to NameCheap for domain registration. Primarily reason is just familiarity and that I was pleased with the experience the first time. It cost me a bit under $10 for a 1 year lease for the domain.
I followed the How do I link my domain to Github Pages guide to create the IPv4 DNS records pointing to the Github Pages IP addresses in the DNS Configuration Panel of my NameCheap account.
A 185.199.108.153
A 185.199.109.153
A 185.199.110.153
A 185.199.111.153
Next was to create the CNAME record to nosajool.github.io.
CNAME www nosajool.github.ioWe can verify the setup using dig.
$ dig jsonwriter.com

; <<>> DiG 9.10.6 <<>> jsonwriter.com
;; global options: +cmd
;; Got answer:
;; ->>HEADER<<- opcode: QUERY, status: NOERROR, id: 23499
;; flags: qr rd ra; QUERY: 1, ANSWER: 4, AUTHORITY: 2, ADDITIONAL: 1

;; OPT PSEUDOSECTION:
; EDNS: version: 0, flags:; udp: 4096
;; QUESTION SECTION:
;jsonwriter.com.                        IN      A

;; ANSWER SECTION:
jsonwriter.com.         1800    IN      A       185.199.108.153
jsonwriter.com.         1799    IN      A       185.199.109.153
jsonwriter.com.         1799    IN      A       185.199.110.153
jsonwriter.com.         1799    IN      A       185.199.111.153

;; AUTHORITY SECTION:
jsonwriter.com.         1800    IN      NS      dns1.registrar-servers.com.
jsonwriter.com.         1800    IN      NS      dns2.registrar-servers.com.

;; Query time: 37 msec
;; SERVER: 192.168.2.1#53(192.168.2.1)
;; WHEN: Wed Jul 01 12:12:54 EDT 2020
;; MSG SIZE  rcvd: 163
Enabling HTTPS
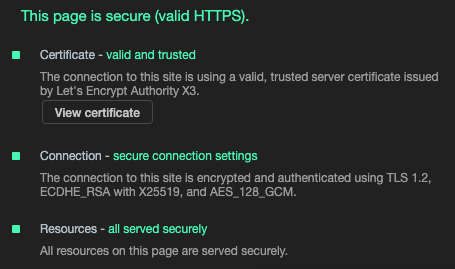
HTTPS allows us to send and receive HTTP traffic from and to the server while communicating over TLS. TLS enables the connection to be secure, authenticated and reliable. Having HTTPS support is essential for any website that may transfer any sensitive data. I personally do not trust any website that does not have the green lock icon; this indicates the lack of HTTPS.
As of 2018, you can enable HTTPS for Github pages with custom domains. This is a nice feature that did not exist back when I was working on the first version of this blog.
Enabling this was a simple checkbox in the settings of the repository after adding the custom domain.
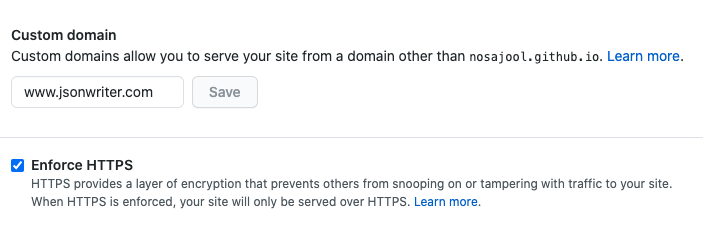
This automatically generated a commit for me to create the CNAME file in the root of the repository.
And after waiting about 30 minutes, voila! We have a server certificate configured to allow which allows us to enable HTTPS on the website.
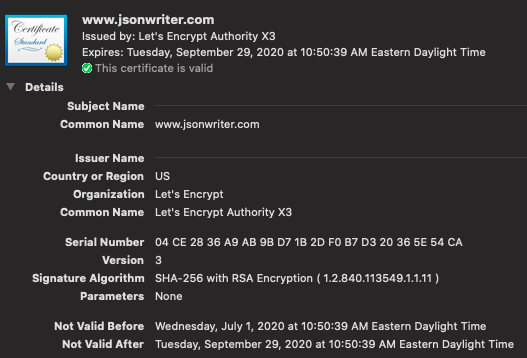
We can see here that Github had partnered with Let’s Encrypt to issue the server certificate. This is a certificate that is valid for 90 months after which I hope there is automation in place for Github to renew it automatically.
This can also validate using openssl s_client:
$ openssl s_client -connect www.jsonwriter.com:443 -servername www.jsonwriter.com -showcerts < /dev/null
CONNECTED(00000006)
depth=2 O = Digital Signature Trust Co., CN = DST Root CA X3
verify return:1
depth=1 C = US, O = Let's Encrypt, CN = Let's Encrypt Authority X3
verify return:1
depth=0 CN = www.jsonwriter.com
verify return:1
Note that we need to pass in the TLS SNI extension -servername www.jsonwriter.com to the command. Without it, we would get the Github.com certificate:
$ openssl s_client -connect www.jsonwriter.com:443 -showcerts < /dev/null
CONNECTED(00000006)
depth=2 C = US, O = DigiCert Inc, OU = www.digicert.com, CN = DigiCert High Assurance EV Root CA
verify return:1
depth=1 C = US, O = DigiCert Inc, OU = www.digicert.com, CN = DigiCert SHA2 High Assurance Server CA
verify return:1
depth=0 C = US, ST = California, L = San Francisco, O = "GitHub, Inc.", CN = www.github.com
verify return:1
The use of the SNI extension is how Github can serve hundreds of thousands of certificates from the same server using the same IP address and port number.
The whole process was really simple and a great user experience to set up. I’m very pleased with the Github Pages, Let’s Encrypt and NameCheap integration and documentation!